SNOWING SNOWMEN!

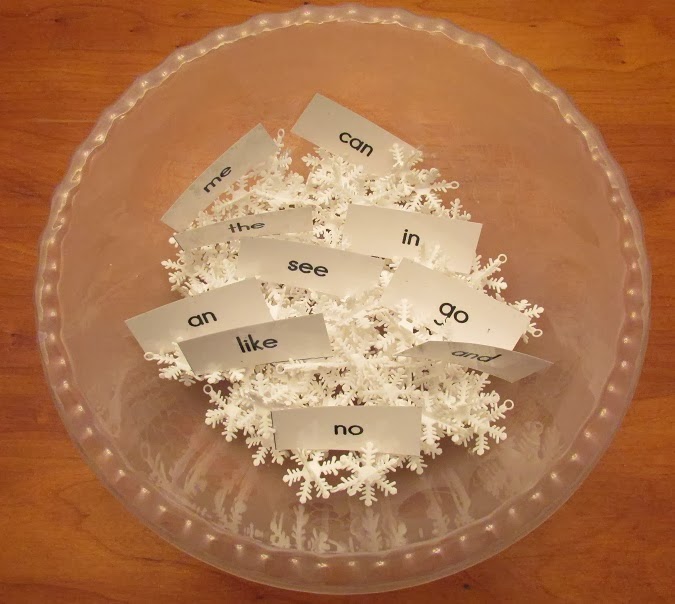
Whether you live in Alaska or Florida, everybody loves snowmen! Here’s a finger play, puppet poem, and story you can make this week and you’ll be good to go back to school!

Five Little Snowmen Finger Play
Five little snowmen fat. (Hold up five fingers.)
Each wore a different hat.
Along came the sun and melted one. (Bend down one finger.)
Now, what do you think about that?

Four little snowmen fat… (Hold up four fingers.)
Three…Two…One
                                                
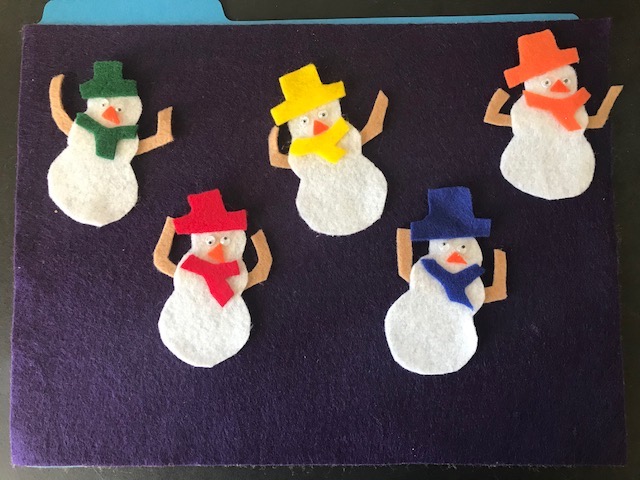
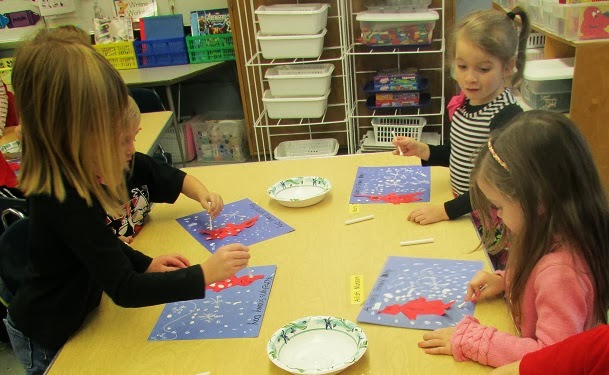
Cut snowmen out of felt as shown. Place a different colored hat on each one. Remove one snowman as each verse is said.
*Place the flannel board and snowmen in a center so children can practice saying the rhyme and make sets.
*Make a simple flannel board by gluing a piece of felt to the front of a file folder. Staple the sides. Store pieces inside and glue a copy of the poem to the back.

Snowman Puppet
Cut a snowman out of heavy paper and decorate with markers. Cut a circle for the nose the width of your index finger. Cut another circle the size of your index finger out of a cup. Match up holes and tape the snowman in place. Put your hand in the cup and stick your index finger through the hole as you repeat the rhyme below.
A chubby little snowman
Had a carrot for a nose.
Along came a bunny
And what do you suppose?
That hungry little bunny
Looking for some lunch
Ate that little snowman’s nose
Nibble, nibble, crunch! (Slowly pull your finger back into the cup.)


Snowman’s Story

Once there was a beautiful snowman made of white snow. Along came a red bird one day and the bird said,
Ha, ha, ha,
He, he, he,
You’re the funniest snowman I ever did see.
The snowman said,
Oh, dear, oh, dear,
Oh, me, oh, me!
Why am I the funniest snowman you ever did see?
Well, said the bird, you should be red like me. Red is such a bright, happy color.
So that night the snowman got some red dye and turned himself red.  
                                                       
The next day along came a yellow duck.
Ha, ha, ha….(The story continues as the snowman dyes himself yellow.)
The next day along came a green frog…
The next day along came blue bug…
            

The next day the snowman was feeling rather sad. Just then along came a little girl. She said, “Why are you so sad?” The snowman said, “I’ve dyed myself red and yellow and green and blue and I just don’t feel like myself.” The little girl said, “You are wonderful just the way you are! Always be yourself!”
So the snowman blinked his eyes and he was once again the color of snow. From then on he was happy just being himself. And that’s why you always see snowmen with happy smiles on their faces.

*Cut a snowman shape out of the front of a file folder. Insert white, red, yellow, green, blue, and white paper. Glue the words to the story on the back. As you tell the story remove the paper to correspond with the story.
Hint! I painted snow on the file folder with White Out.

Snowflake Words

3 Words… Target.  Dollar.  Spot.   These are the kids’ new magic “winter reading glasses!”  $1!  They had Santas and Reindeer, too, but I liked these because they work all winter.

They will be great for our Snow Sight Word Write. For some reason, special glasses really help them focus!

I used a big white bin for my “snow sight words.” Here are some snow ideas you can use, shown in large bowls.

The children dig through the snow to find sight words and record them on their Snowy Sight Word Sheet.  These are just some of the things I use for snow, you can use anything! The items work best when there are a LOT of whatever you use,  in a big container.  The more to “feel,” the better!

(I had LOTS of these pearls left from my daughter’s wedding. They came is a big container from Walmart.)


Rice

(This is just showing the sight words hidden in the rice.)

Snow Storm! I used packing peanuts, cotton balls, plastic snowflakes I had, beans, and rice. This makes a really fun sensory table in a big tub or bin!.

Cotton Balls

Plastic Snowflakes

Packing Peanuts

Beans are some of my favorites. If you put them in the freezer before center time, and they stay really cold! Plus, I can write the words right on the beans.

I found this pack of snowflakes 75% off at Walmart! WOOHOO. I am going to write sight words on these snowflakes to use for my snowflake words.

Here is a copy of my Snowflake Word Recording Sheet. Click on the picture if you would like a copy of it. I used Susanna Westby’s adorable snowflake background for the first page in color, and just black and white for the other page.

https://drive.google.com/file/d/0Bw4BuVZdT_UxYkFoZlg5MUY3YTA/edit?usp=sharing

We have so many ideas like this in our monthly Happies packets.  Feel free to check out the previews for our packets each month.  Our packets are FULL of ideas to bring happiness to your classroom.  You can find these at Dr. Jean’s website or at my TpT Store!

Thank you for stopping by!

Image result for snow gif

The Snowy Day

The Snowy Day is such a sweet book and good for teaching so many things.

We have been working on writing small moments in our Narrative Unit. This story works great as a mentor text. We usually read it before Christmas and then again in the winter. I love to play the sight word snowball game after we read this story.  I write sight words on pieces of scrap paper, wad them up, and place them on a masking tape line in the middle of the rug.  The class is divided into two teams, one on each side of the line.  When I say, “Go,” everyone picks up the “snowballs” and tries to throw them to the opposite side of the rug.  The goal is to have the least number of snowballs on their side of the rug.  After about a minute (that’s really long enough for a round of this game…), I say, “FREEZE.”  Everyone must freeze and I count the snowballs on each side.  Then, everyone must pick up a snowball, unwrap it, and read the word to me.  They can then wad it up again and place it on the line for another round, or toss it into the recycling bin and be done!

This week, we made snow with Q-tips and chalk.  This activity is student directed, easy, and fun.  I made and copied little Peter characters on red paper. The children cut these out and drew on his face and buttons.  You can find Peter on Google images and make copies of the image for each child, too.  Then, they could experiment with chalk and paint with Q-tips to make their own snowy days.  I taught them how I make snowflakes, and it was a very relaxing, quick little activity.  Some kids had forts and blizzards.  Some had a few flurries.

We have so many ideas like this in our monthly Happies packets.  Feel free to check out the previews for our packets each month.  Our packets are FULL of ideas to bring happiness to your classroom.  You can find these at Dr. Jean’s website or at my TpT Store!

Thank you for stopping by!

Image result for the snowy day gif

It’s Mitten Weather

Mitten Weather

Thumbs in the thumb place      (Stick out thumbs.)

Fingers all together.                  (Put fingers together.)

This is the song

We sing in mitten weather.        (Wiggle palms left and right.)

When it is cold                           (Wrap arms around self and shiver.)

It does not matter whether         (Shake head.)

Mittens are wool                        (Hold out right hand.)

Or made of finest leather.          (Hold out left hand.)

Mitten Applause

This is a quiet way to teach the children to applaud.  Thumbs up and palms open facing each other.  Pretend to clap stopping about 2″ from each palm as if wearing mittens.
The three little kittens may have lost their mittens, but here’s a pattern so you can make your own mittens for these games.

https://drive.google.com/file/d/0B1SnEagA4jljeFdMMzBGdTc0Qjg/view?usp=sharing


Visual Matching

Cut mittens out of a wallpaper book or wrapping paper.  Cut two out of each pattern and then mix them up.  Give children clothespins to clip the matching ones together.  Introduce vocabulary to describe various patterns, such as “stripes,” “checked,” “plaid,” “solid,” “polka dots,” “animal print,” etc.

photo-15.jpg

*Make mitten matching games with upper and lowercase letters or with pictures and beginning sounds.

*Make mitten matching games with antonyms or snynonyms.

*How about a matching game with math facts and answers?

   IMG_7333.JPG

Hint! Hang a piece of string between two chairs so the children can hang up their matching mittens.

IMG_7332.JPG


Kitten Game

One person is “Mama” or “Papa” cat.  “Mama” or “Papa” go out in the hall while the teacher selects 3-5 students to be their kittens.  All students put their heads on their desks.  The students who are kittens begin make quiet “meowing” noises.  “Mama” or “Papa” cat must walk around the room and try to identify their kittens.  When a kitten is found that student puts her hand in the air.  The last kitten to be found becomes the new “Mama” or “Papa” cat.

Mitten Art

Let children trace around mitten patterns and cut out two.  Can they decorate the mittens with crayons or markers so they look exactly the same?   Hole punch around the sides of the mittens and sew with yarn.

photo-16.jpg

Hint!  Wrap the end of the yarn with tape to make it easier to sew.

The Mitten

Select several different versions of “The Mitten” and read them to your class.  Compare and contrast stories and illustrations.  Let the children vote on their favorite.

*This is also a delightful tale to dramatize.  A blanket on the floor works just fine as a mitten.

JANUARY FUN AND GAMES FOR YOUR LESSON PLANS

So, what do you want to do today?  Do you want to clean up all the holiday mess or do you want to work on lesson plans?  No and No?  Well, save these ideas for when you do want to work on January plans. These activities don’t have “rigor,” but they’ll add a some fun to a cold day.

Snow Dough

You can use any play dough recipe for snow dough. Simply omit the food coloring and let the children knead in iridescent glitter to make it sparkle. (My favorite dough is: 2 cups flour, 2 cup salt, 2 TB. cream of tartar, 2 TB. vegetable oil, and 2 cups water. Mix ingredients together in a pan until smooth. Cook over medium heat, stirring constantly until the mixture forms a ball and sticks to the spoon. Cool and knead. Store in airtight containers.)
Note! Make sure children wash hands before and after playing with dough.

Add a little learning! Have children make objects that reinforce language skills, such as things that rhyme or objects that start with the same sound.
*Have children use play dough to show different ways to make a number.
*Let them make two and three dimensional shapes with the dough. 


Snow Flakes 

Let children fold coffee filters in half, then fourths, and eighths. Cut little “bites” out of the folded edges. Open. You can make colorful snowflakes by coloring the coffee filters with water soluble markers before cutting them.

*You can also use tissue paper or newspaper to make snowflakes.

                            
Add a little learning! Give children copy paper cut in circles and challenge them to fill the page with sight words, letters, vocabulary words, or any skill you want to reinforce. Now, let them fold the paper and make a snowflake out of it. Can they still identify the words and letters they wrote?

Snow Prints
Invite children to draw winter scenes on blue construction paper with crayons. Give them white paint and a sponge or Q-tip to “make it snow.”

Add a little learning! Write winter vocabulary words or stories and then make it snow.        


Ice Skating 

Give each child 2 paper plates. Demonstrate how to place these on the floor and put one foot on each plate. Slide your feet as if skating. Put on some waltz music and let the children skate, twist, and turn. Play “freeze.” When you stop the music children must “freeze” in their positions. When the music begins again they may continue to skate.

Add a little learning! Write letters, words, math facts, etc. on the plates. When the music stops the children have to exchange plates with a friend and identify the information on the new plates.

Snowballs 
Give children scrap paper and have them write sight words, letters, math facts, or other skills on them. Divide the class into two teams and have them stand on opposite sides of the room. Wad up the paper to make snowballs. When the teacher says, “Let it snow!” the children begin throwing the snowballs at the opposite team. They must quickly find a snowball, open it, and identify the information before throwing it back at the other team.

Let It Snow!
You will need jumbo craft sticks and an empty plastic cup for this game. Write simple sentences, sight words, letters, math facts, etc. on the sticks with a permanent marker. Glue a snowflake to the end of 2 sticks. Place the sticks in the can with the snowflakes on the bottom. Children pass the cup around, choose a stick, and read the information. If they choose the snowflake they sing, “Let it snow, let it snow, let it snow!” and put all  their sticks back.

Icebergs 
Fill plastic containers with water. Add food coloring and freeze. Place these in your water table and tell the children they are icebergs. Add walruses, polar bears, and other plastic arctic animals.

Add a little learning! Have children predict how long it will take the “icebergs” to melt. Who guessed the closest time?

The Day After Christmas

It’s the day after Christmas and time for leftovers and cleaning. I hope you all have a special memory to treasure in your heart. It’s sad to put away the lights and the “merry” until next year, so here are a few (inexpensive) ideas to make yourself feel better today!


1. Go for a walk or get some exercise.
2. Call someone (yes, on the phone) you haven’t talked to in a long time.
3. Read a book.
4. Go to a movie.
5. Make some hot chocolate or have a cup of tea.
6. Take a bubble bath.
7. Put on some favorite music and dance by yourself.
8. Look at photos or videos of Christmas.
9. Take an imaginary vacation on the internet.
10. Make a list of all the things you have to be happy about. 


And here’s one more idea to give you something to look forward to in 2018!  Make plans to join me at one of my seminars so we can sing and dance and remember how much fun it can be to teach!

“ACTIVE LEARNING ADVENTURE:
Let’s Make it Purposeful, Planful, and Playful!”

*Please contact sde.com for details on these locations.

1/23/18 – New Orleans, LA
2/8/18 – Baltimore, MD
2/13/18 – Charlotte, NC
3/6/18 – Indianapolis, IN
3/27/18 – Jackson, MS
4/18/18 – Rockford, IL

3/12/18
New England PreK-2 Conference
Manchester, NH
SDE.com

4/20/18
UW-Stout Early Childhood Conference
Menomonie, WI
uwstout.edu/ececonference.

LOOK ON THE BRIGHT SIDE DAY

Look on the Bright Side Day is today (For real! I don’t make this stuff up.) It’s a day to be optimistic and look for something positive. Between the shopping, baking, trimming, and wrapping there’s got to be a smile and a warm feeling in your heart.


I’m going to look on the bright side and make this wish for Christmas!


All I want for Christmas is for teachers to be respected and given more latitude to do their jobs.

I want “rigor” and “instructional time” to be replaced with joyful learning.

I want the focus on the whole child (social, emotional, physical, and intellectual) instead of test scores and standards.

I want teachers to be able to sing a song, read a book, and play a game just because!

I want parents and administrators to be less critical. Education is not a snap shot, but a video. Step back and take a look at the whole journey.

I want anyone who makes decisions about what children should be expected to do at a particular grade level to have taught that grade. (It’s easy to make lists of what children should be able to do if you’ve never been there!)

I want less emphasis on technology and more on hands-on, interactive learning.

I want teachers and children to be happy.

I want peace on earth.

And I want all of you to find a little JOY this holiday season!


Now, I’m going to look on the bright side and turn this computer off until December 26!  Blessings of love and peace and JOY to all of you! 

Bundle Up!

The Jacket I Wear in the Snow, by Shirley Neitzel, is one of my favorite winter books to use in my classroom to teach labeling, recall, and opinion writing.  The kids have a lot of fun with it.  It also gives me yet another chance to remind them of everything they need to bring to school each day to go outside to play in the winter.

It’s about a little child who gets dressed in all sorts of layers and is very uncomfortable in it all.

The first time when we read the book, we share our opinions about why we think the  child was crying.  You’ll get lots of different answers, which is great! It’s such a good way to introduce opinions. We talk about how one person’s idea wasn’t right or wrong, but each idea is what each person thought made the child cry.  An opinion can’t be wrong, because it is what you think.  Opinions can be different from other people’s, but that doesn’t make one right and one wrong. (Sometimes kids are better at remembering this than adults are…)

After we read the story, we do an interactive writing activity to label our winter person. It’s great to watch (and listen to) the children hearing  sounds as they stretch out those words.  I  leave this poster up as another reminder about what to wear in the winter.

We  talk about what, “Bundle up,” means.  Some of their ideas are great, like  wrap up in a blanket  or  carry a cat…  OK…

You could also have a child come up all dressed for outside and label him or her with Post-its (Like this picture from Julie Lee) or 3″x 5″ cards with tape on back (because sometimes my Post-its don’t stick great on people- I know- isn’t that strange?! I’m sure that is what they are made for, right?)  and really talk about each piece of winter clothing.

I take a picture of each child dressed for winter one day before they go out to play,  and print it out for their project. ( I cut the pictures out for them.)   Each child’s picture goes on a background paper.

I made several different versions of the background paper. Some have snowflakes. One has lines if you would like the children to write more.  One is blank if you want the children to add their own snowflakes. Click on the picture below if you would like a copy.

https://drive.google.com/file/d/0Bw4BuVZdT_UxS080dVI5ODFyNVk/edit?usp=sharing

Here are some samples from other years:  I printed my background on blue paper. I also had some extra batting left over from Christmas, so I cut “snow” for the bottom of the paper.

The children labeled  themselves.

(NJ hat is ninja hat, in case you wondered.)

Then, they added snowflakes with Q-Tips and white paint.

When the pictures were all dry, we shared them on the rug.

I hung these over the children’s lockers.  I also made a black and white copy for each child to take home to remind them what they need to bring to school each day. (You know- I really drilled this into the ground.)
Every month, Dr. Jean and I have lots of reading activities, as well as activities and songs for all subject areas, in our monthly HAPPIES packets!  You can find these at Dr. Jean’s website or at my TpT Store!

Have fun and thank you for stopping by!

b2c8e-signature

Math Fact Chains

Here is a great way to visually show children addition facts as they are learning them. We  made addition sentence chains that the children hung on their lockers.  Each child had a fact written on a star that they had to create a math fact chain for.  To prepare this lesson,  I cut lots of red and green strips and wrote a fact on a star for each child.  We work on addition facts to 5, so this was my focus.  I had the children use a stapler to make the chains.  This worked better for me than glue.  You can do either!  They love using the small staplers.

I put them up hoping they might make it through the day- but the kids were SO careful with the chains when they opened and closed their lockers, they lasted a long time! You could also hang these from the ceiling to decorate your room.

We have so many ideas like this in our monthly Happies packets.  Feel free to check out the previews for our packets each month.  Our packets are FULL of ideas to bring happiness to your classroom.  You can find these at Dr. Jean’s website or at my TpT Store!

Thank you for stopping by!

Candy Cane Fun Part 2

Just in case you want a week of candy cane fun, here are a couple more quick ideas.  For this candy cane activity, I cut lots of large, medium, and small red and white circles. I had each size on its own table. The kids could make whichever sizes they wanted. This was a lot of fun for them because they made these all on their own and had choices. Here are my samples.  I didn’t even make them write sight words or anything on them- nope!  JUST for fun.

This next idea is another fun way to practice sight words.  I cut some red and white candy cane shapes.

I printed out our sight words on both red and white paper. I cut them into strips. You could have the kids cut them out, but my objective for this activity was for the kids to choose sight words, read them, and write them- not cutting- so I had them already cut apart.

This was an independent center. I had one table set up with red candy canes and white words- and another set up with white candy canes and red words. The children chose which one they wanted to make.


The children chose ten different word stripes to add to their candy cane. After they made their candy cane, they read their words to a friend at their table. Then, they wrote their words on a recording sheet.  You can have the children read the words to you when they are done.

I had each child put a scrap piece of paper under the candy cane cut-out so the glue didn’t go all over the table when they glued on the strips.

After they glued on the strips, I turned the candy cane over and helped the children trim the edges.

When they finished this center, they got a mini candy cane to take home and eat as they read their candy cane words to a grown up.

Here is a copy of the sight word sheet I used and the recording sheet in case you’d like it. Just click on the picture if you would like a copy.

https://drive.google.com/file/d/0Bw4BuVZdT_UxYXlCb1BrZEFzaDQ/edit?usp=sharing

And don’t forget the peppermint smelling playdough!  That’s always a winner, too!

We have so many ideas like this in our monthly Happies packets.  Feel free to check out the previews for our packets each month.  Our packets are FULL of ideas to bring happiness to your classroom.  You can find these at Dr. Jean’s website or at my TpT Store!

Thank you for stopping by!